WHY ILLUSTRATOR?
Adobe Illustrator is one of the most popular applications among graphic designers, especially those who specialize in designing logos. When it comes to designing logos the advantages of Adobe Illustrator are many, including the fact that it is a vector-based software i.e. you can scale the image to extremely large proportions and still not lose out on quality (Remember how images get pix-elated on scaling in raster-based (non-vector) programs like Photoshop?). The other benefits of using vector-based software like Illustrator is that you can have low-sized files and you can also edit your designs easily and conveniently as compared to raster-based software.
Now that you know the basic advantages, you are in a better position to understand the settings that you would need to make in order to get the most out of Adobe Illustrator. These settings are for beginners and as you become more proficient in using this amazing tool, you might make custom settings that would suit your designing style.

1. SETTINGS FOR CHOOSING A NEW FILE
This is the very first step before you begin your work in Illustrator. Here is a guide on how to select suitable options according to your needs:
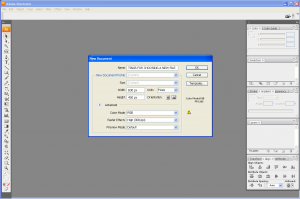
Choose File – New
A dialogue box will open as shown in the figure. Everything is quite straightforward here and you can select the dimensions of the page according to your needs.
While selecting the color mode, remember that if you’re designing for printing purposes then select CMYK and if you’re planning to display it through a digital media on a screen, then select RGB.
This is because CMYK is subtractive while RGB is additive. You can understand and remember it this way – CMYK considers its canvas as a paper with a white background while RGB considers its canvas as a digital screen which will obviously have a black background since when the tiny lights that make up the screen are off, all we see is black.
2. SELECTING A SUITABLE WORKSPACE
The workspace is all the options, tables and buttons that you see around your canvas.
Choose Window – and select the options that you may need are the ones that you frequently use. My favorites are:
Align
Appearance
Color
Color Guide
Control (the horizontal list of options between the canvas and the toolbar)
Gradient
Layers
Pathfinder
Stroke
Swatches
Tools (the tall vertical list of options on the left)
Transparency
These are the options which you might have to use on a regular basis so it’s better that you save this workspace so that you don’t have to select them all over again if the settings are reset.
To save the workspace, select Window – Workspace – Save Workspace.
3. SETTING PREFERENCES
Though the default settings won’t pose any obstacles for a beginner, there are one or two settings that you may wish to change.
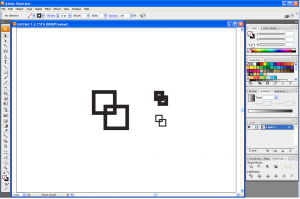
The first one is that of the ability to scale strokes and effects. Many beginners find that when they apply stokes to objects and then scale the objects the stroke is not scaled along with the object. This gives rise to ridiculous results. Below is an example of an image scaled down with and without scaled strokes.
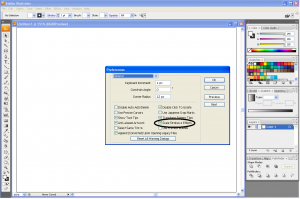
So, in order to ensure that you can scale strokes and other effects, make the following changes:
Select Edit – Preferences – General – and then check the option that says ‘Scale Strokes & Effects’.
Some other options that you may want to change are that of ‘Smart Guides & Slices’ and ‘Appearance of Black’.
4. RULERS AND GUIDES
Rulers and Guides are extremely helpful whenever you’re using the pen tool, the shape tool, the rotate tool, and also during many other crucial designing steps when you have to engage in a free drawing. Just select View – Show Rulers and View – Smart Guides and you’ll receive a lot of help from these tools.
5. SWATCHES AND COLORS
If you want to select a different color from the ones that have been provided in the swatches, then all you have to do is to double-click on the little box in the ‘Color’ box.
This will open a new box where you can pick the color of your choice or if you know the color code then you may type it in and get your desired color.
Alternately, you can make a new Swatch by clicking on the ‘New Swatch’ option in the Swatch box.
{click on images to enlarge}


